






It happens in the most ordinary moments. You stand up after a long meeting and feel that familiar twinge behind your kneecap. Or you pause at the top of the stairs, wondering if today is the day the pain wins. Maybe you’ve already tried rest, ice, and the bottle of anti-inflammatories in your cabinet — and you’re starting to worry that surgery is the only path left.
Here’s what most people don’t realize: knee pain is rarely a single problem with a single solution. It’s a signal — and natural relief works best when you treat it as a system, not a symptom.
This guide gives you exactly that. Not a scattered list of remedies you try once and forget, but a proven three-phase progression that builds on itself. You’ll start with immediate relief you can feel today. Then you’ll strengthen the muscles that protect your knee long-term. Finally, you’ll optimize the habits — diet, weight, recovery — that prevent the pain from coming back.
By the end, you’ll know precisely what to try first, what to add next, and when it’s time to call a professional. Let’s start with the foundation: getting you out of pain right now.
Phase 1 — Foundation: Immediate Relief
When knee pain flares, your first instinct might be to sit down and wait for it to pass. But the best immediate response is more strategic than stillness. The Foundation phase is about reducing inflammation, protecting the joint, and creating conditions where healing can actually begin — all without reaching for a pill bottle.
The Updated RICE Protocol
Rest, Ice, Compression, Elevation — you’ve heard it before. But most people apply it wrong. Here’s the protocol that actually works:
- Rest smart — Not bed rest. Avoid activities that trigger sharp pain (running, deep squats, kneeling), but keep gentle movement like walking on flat surfaces. Complete immobility stiffens the joint and slows recovery.
- Ice correctly — 15 to 20 minutes per session, wrapped in a thin cloth (never directly on skin). Apply 2 to 3 times daily during acute flare-ups. Ice reduces inflammation and numbs pain signals.
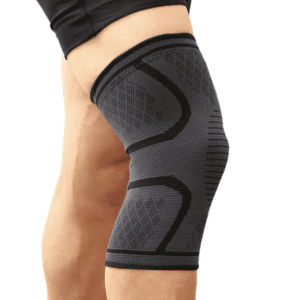
- Compress strategically — A well-fitted knee sleeve or wrap provides gentle pressure that reduces swelling, keeps the joint warm, and gives your brain better positional feedback. More on this below.
- Elevate properly — Lie flat and raise the knee above heart level for 20 to 30 minutes, 2 to 3 times daily. This uses gravity to drain excess fluid from the joint.
Ice vs. Heat: The Decision Tree
Use ice for: recent injuries, visible swelling, acute flare-ups, warmth around the knee, pain after activity. Ice constricts blood vessels and calms inflammation.
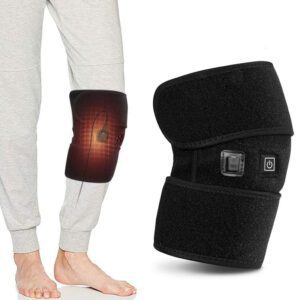
Use heat for: stiffness without swelling, chronic aching, preparing for exercise, morning rigidity. Heat increases circulation and relaxes tight muscles around the joint.
Never use heat on a swollen or freshly injured knee — it can increase inflammation. When in doubt, start with ice.
The Compression Advantage
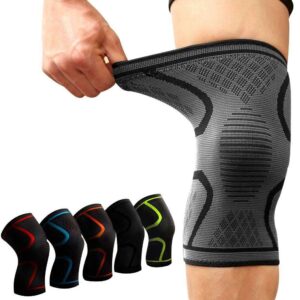
Compression gear is one of the most underrated tools in natural knee pain relief. A quality knee compression sleeve works in three ways:
- Improves circulation — The gentle pressure helps blood flow more efficiently, delivering nutrients and removing inflammatory waste products.
- Reduces swelling — By limiting fluid accumulation in the joint space, compression keeps the knee from ballooning after activity.
- Proprioceptive feedback — This is the hidden benefit. The sleeve gives your nervous system better awareness of where your knee is in space, which reduces instability and guards against movements that cause pain.
What to look for: Graduated compression (tighter at the bottom, looser at top), breathable fabric that wicks sweat, and a snug but not restrictive fit. You should be able to slide two fingers under the edge comfortably. Wear during activity and for 2 to 4 hours after if you’ve had a flare-up.
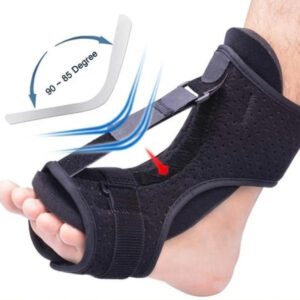
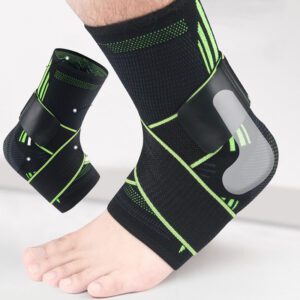
For acute injuries or severe instability, a hinged knee brace provides more structural support than a sleeve. For mild to moderate pain during daily activities, a sleeve is usually sufficient and far more comfortable for all-day wear.
The Movement Paradox
Here’s the counterintuitive truth: complete rest often makes knee pain worse. The synovial fluid that lubricates your joint requires movement to circulate. Cartilage receives nutrients through a pumping action that only happens when you move. Ligaments and tendons weaken when unused, making the joint less stable over time.
The key is gentle, pain-free motion. Short walks on level ground. Easy cycling with low resistance. Swimming or water walking where buoyancy unloads the joint. These activities maintain mobility without aggravating inflammation.
Phase 1 action plan: Start RICE today. Add a compression sleeve for daily activities. Keep moving gently, but avoid anything that causes sharp pain. Spend 1 to 2 weeks in this phase before progressing to Phase 2.
Phase 2 — Strengthen: Build Resilience
Once acute inflammation calms, the real work begins. Most knee pain stems from weak or imbalanced muscles that fail to support the joint properly. Strengthening isn’t about becoming an athlete — it’s about building the specific muscular support your knee needs to handle daily life without breaking down.
The golden rule of knee strengthening: Start low, go slow, and never push through sharp pain. A dull muscle burn is acceptable. A sharp joint stab is not. That distinction protects you from turning a manageable problem into a serious injury.
Level 1: Seated and Non-Weight-Bearing (Weeks 1-4)
These exercises build foundational strength without stressing the joint:
- Quad Sets — Sit with your leg straight. Tighten the thigh muscle and press the back of your knee toward the floor. Hold 5 seconds. Do 10 reps, 3 sets. This activates the quadriceps without bending the knee.
- Straight Leg Raises — Lie on your back, one knee bent. Lift the straight leg 12 inches, hold 2 seconds, lower slowly. 10 reps, 3 sets. Builds hip flexor and quadriceps strength.
- Heel Slides — Lie on your back, slowly slide your heel toward your buttocks, bending the knee. Slide back out. 10 reps, 3 sets. Restores range of motion gently.
- Glute Bridges — Lie on your back, knees bent. Lift your hips until knees, hips, and shoulders form a straight line. Hold 3 seconds. 12 reps, 3 sets. Strong glutes stabilize the entire leg chain.
Level 2: Partial Weight-Bearing (Weeks 3-8)
Progress here only when Level 1 exercises cause zero pain during and after:
- Mini Squats — Stand holding a counter. Lower 6 inches only — think “sit back slightly,” not “full squat.” 8 reps, 3 sets. The limited range protects the knee while building strength.
- Step-Ups — Use a 4-inch step (a thick book works). Step up, tap the other foot, step down slowly. 8 reps each leg, 2 sets. The controlled lowering builds eccentric strength, which is crucial for joint stability.
- Stationary Cycling — Set the seat high enough that your leg is almost straight at the bottom of the pedal stroke. Zero resistance for 10 minutes. The circular motion lubricates the joint without impact.
- Wall Sits — Lean against a wall, slide down until knees bend to 45 degrees. Hold 15-30 seconds. 5 reps. Builds isometric quadriceps strength that directly supports the kneecap.
Level 3: Functional Movement (Weeks 6-12+)
These exercises prepare your knee for real-world demands:
- Walking Program — Start with 10 minutes on flat, even surfaces. Add 2 minutes every 3 days. Goal: 30 minutes continuous walking without pain.
- Single-Leg Balance — Stand on one leg near a counter, 30 seconds each side. Progress to eyes closed for an added challenge. Balance work trains the small stabilizing muscles that prevent wobbling and reinjury.
- Lateral Step-Outs — Place a resistance band around your ankles. Step sideways 10 steps, then back. 2 sets. Strengthens the hip abductors, which are often weak and contribute to knee collapse inward during walking.
Warning Signs to Stop Immediately
Your body speaks a clear language. Ignore it and you risk making things worse. Stop exercising and return to Phase 1 if you experience:
- Sharp or stabbing pain during exercise
- Swelling that appears within 24 hours of a new exercise
- Knee locking, catching, or giving way
- Pain that persists or worsens 48 hours after exercise
- New numbness or tingling in the leg or foot
Frequency protocol: Exercise 3 to 4 times per week, never two days in a row. Recovery days are when muscles actually strengthen. Each session should last 15 to 20 minutes. Expect noticeable improvement in joint stability and daily comfort within 3 to 4 weeks of consistent practice.
The 5-Minute Morning Knee Routine
Mornings are often the worst for knee pain because fluid accumulates overnight and tissues stiffen. This zero-equipment routine takes five minutes and sets the tone for the entire day:
- Heel Slides (60 seconds) — Before getting out of bed, bend and straighten each knee 10 times to restore range of motion.
- Quad Sets (60 seconds) — Tighten each thigh muscle, hold 5 seconds, 6 reps per side. Wakes up the primary knee stabilizer.
- Standing Calf Raises (60 seconds) — Hold the bed frame, rise onto toes, lower slowly. 15 reps. Activates the lower leg pump that helps fluid drainage.
- Gentle Knee Circles (60 seconds) — Stand, lift one knee, make 10 small circles clockwise, then counterclockwise. Switch legs. Lubricates the joint before weight-bearing.
- Hip Flexor Stretch (60 seconds each side) — Hands on a wall, step one foot back, press hip forward. Tight hip flexors pull on the knee and alter gait. This releases them before your day begins.
Do this every morning for two weeks. Most people notice the biggest difference in how their knee feels getting out of the car or climbing the first flight of stairs.
Phase 2 action plan: Add Level 1 exercises in Week 3. Progress to Level 2 in Week 5 if pain-free. Begin Level 3 in Week 7. Continue compression sleeve use during exercise for proprioceptive support. Stay at each level for at least 2 weeks before advancing.
Phase 3 — Optimize: Prevent Recurrence
Pain relief is only half the battle. The other half is making sure the pain doesn’t return next month. Phase 3 addresses the root causes that keep knee pain cycling back: inflammation from within, excess joint load, and habits that quietly sabotage recovery.
Weight Management: The Multiplier Effect
If you’re carrying extra weight, this is the single most impactful change you can make. Research from Johns Hopkins confirms what many patients feel intuitively: every pound of body weight translates to approximately four pounds of pressure on your knees during daily activities like walking. On stairs, that multiplier climbs even higher.
Losing just 10 pounds removes 40 pounds of pressure from each knee with every step. Over a day of normal walking, that’s thousands of pounds of reduced cumulative load. The effect on cartilage preservation and pain reduction is dramatic — and it’s entirely within your control.
You don’t need a dramatic diet. Start by replacing one processed meal daily with whole foods. Add a 20-minute walk. Small changes compound, and your knees feel the difference.
The Anti-Inflammatory Kitchen
Chronic knee pain is, at its core, an inflammation problem. And inflammation is significantly influenced by what you eat. Here’s a practical, meal-based approach rather than vague advice:
Breakfast — Turmeric-Ginger Recovery Smoothie
- 1 cup unsweetened almond milk
- 1 frozen banana
- 1 cup spinach
- 1 teaspoon turmeric powder (or 1 inch fresh turmeric root)
- ½ inch fresh ginger, grated
- Pinch of black pepper (essential — it increases curcumin absorption by 2,000%)
- 1 tablespoon almond butter
Blend until smooth. Drink 4 to 5 mornings per week. The curcumin in turmeric is one of the most studied natural anti-inflammatory compounds, with multiple clinical trials showing reduced joint pain and stiffness.
Lunch — Omega-3 Salmon Salad
- 4-6 oz grilled or baked wild salmon
- 2 cups mixed dark leafy greens (kale, arugula, spinach)
- ½ cup blueberries (anthocyanins reduce inflammation)
- ¼ cup walnuts (omega-3 ALA)
- Dressing: olive oil, lemon juice, salt — simple and anti-inflammatory
Eat this 3 to 4 times per week. Salmon provides EPA and DHA omega-3 fatty acids, which your body converts into compounds that actively resolve inflammation.
Dinner — Bone Broth Vegetable Soup
- 2 cups bone broth (collagen, glucosamine, chondroitin naturally present)
- 1 cup diced butternut squash
- 1 cup chopped broccoli
- ½ cup diced carrots
- 1 can white beans (rinsed)
- Fresh rosemary and thyme
Simmer 30 minutes. The collagen in bone broth provides the building blocks your cartilage needs, while the vegetables deliver antioxidants that fight oxidative stress in joint tissues.
Daily anti-inflammatory habits: Drink 2-3 cups of green tea (EGCG reduces inflammatory markers). Snack on walnuts or dark berries. Eliminate or drastically reduce refined sugar and processed seed oils — both directly increase inflammatory cytokines.
Supplement Protocol with Realistic Expectations
Supplements can help, but only if you choose the right ones at the right doses and give them enough time. Here’s what the evidence actually supports:
- Turmeric / Curcumin — 500-1000mg of curcuminoids daily, with black pepper extract (piperine) or in a liposomal formula for absorption. Timeline: 4 to 6 weeks for noticeable reduction in joint stiffness and pain scores. Look for products standardized to 95% curcuminoids.
- Omega-3 (EPA/DHA) — 1-2 grams combined EPA and DHA daily, preferably from fish oil. Timeline: 8 to 12 weeks for significant improvement in inflammatory joint symptoms. Quality matters — molecularly distilled, third-party tested for purity.
- Glucosamine/Chondroitin — 1500mg glucosamine sulfate + 1200mg chondroitin sulfate daily. Timeline: 4 to 8 weeks. The evidence is mixed, but a subset of patients (particularly those with moderate osteoarthritis) report meaningful improvement. Give it 2 months before deciding if it works for you.
- Collagen (Type II) — 10-40mg undenatured Type II collagen daily, or 10g hydrolyzed collagen peptides. Timeline: 8 to 12 weeks. Emerging research suggests collagen peptides may stimulate cartilage repair and reduce joint discomfort in active individuals.
What to skip: Any supplement promising “instant relief” or “rebuilds cartilage overnight.” Natural processes take weeks, not hours. Also be wary of proprietary blends that don’t disclose exact dosages.
Sleep, Stress, and Recovery
These invisible factors are often the missing piece. Poor sleep elevates cortisol, which increases systemic inflammation. Chronic stress does the same. And inadequate recovery between exercise sessions prevents the very tissue repair you’re trying to stimulate.
Sleep target: 7-9 hours, with a consistent bedtime. Your body performs most tissue repair during deep sleep. If pain wakes you, experiment with a pillow between your knees (side sleepers) or under your knees (back sleepers) to reduce joint pressure.
Stress management: Even 10 minutes of daily meditation, walking in nature, or breathwork reduces inflammatory markers. The mechanism is real and measurable.
Phase 3 action plan: Implement the anti-inflammatory smoothie 4-5 mornings per week. Add one omega-3-rich meal weekly. Start one evidence-based supplement. Prioritize sleep consistency. These changes compound over months into lasting knee resilience.
The Complete 12-Week Recovery Timeline
Random tips don’t create lasting change. Structure does. This timeline tells you exactly what to focus on each week, so you’re never wondering “what should I try next?”
Weeks 1–2: Reset and Relieve
- Begin daily RICE protocol for flare-ups
- Wear compression sleeve during waking hours
- Start the 5-minute morning knee routine
- Take 10-minute walks on flat ground every other day
- Replace sugary breakfast with anti-inflammatory smoothie 3x/week
Goal: Reduce acute inflammation. Most people notice less morning stiffness by Day 10.
Weeks 3–4: Activate and Mobilize
- Add Level 1 exercises (quad sets, straight leg raises, heel slides)
- Increase walks to 15 minutes
- Begin turmeric/curcumin supplement (500mg daily)
- Implement anti-inflammatory smoothie 5 mornings per week
- Experiment with heat before exercise, ice after
Goal: Restore range of motion and begin building support muscle. Pain during daily activities should start decreasing.
Weeks 5–6: Strengthen and Assess
- Progress to Level 2 exercises (mini squats, step-ups, cycling)
- Increase walks to 20 minutes
- Add omega-3 supplement (1g EPA/DHA daily)
- First major check-in: Has pain improved by at least 20%?
Decision point: If you’ve followed the protocol faithfully and see zero improvement, consult a physical therapist or orthopedic specialist. You may need manual therapy or imaging to identify structural issues.
Weeks 7–8: Progress and Expand
- Begin Level 3 functional movements (single-leg balance, lateral work)
- Walk 25-30 minutes continuously
- Add collagen supplement if desired
- Evaluate footwear — consider replacing worn shoes
- Introduce one new anti-inflammatory dinner weekly
Goal: Build functional strength for real-world demands. Many people report their knee feels “more secure” during stairs and inclines.
Weeks 9–12: Optimize and Maintain
- Maintain Level 3 exercises 3x/week
- Add recreational activity (hiking, swimming, light tennis)
- Assess weight — if you’ve lost even 5 pounds, note the difference in knee comfort
- Fine-tune supplement stack based on what worked
- Establish sleep routine targeting 7+ hours
Decision point at Week 12: If pain is manageable but not fully resolved, continue maintenance mode. If pain still significantly limits activity, seek professional evaluation. You’ve given natural methods a fair trial — now get targeted help.
The most important rule: Never advance to the next phase if the current one causes pain. Some people spend 4 weeks in Phase 1 before their knee is ready for strengthening. That’s not failure — that’s listening to your body.
Red Flags: When Natural Isn’t Enough
Natural relief is powerful, but it’s not always sufficient. Knowing when to seek professional help isn’t admitting defeat — it’s choosing the right tool for the job. Here are the clear signals that it’s time to call a doctor.
Seek Immediate Medical Attention (Emergency)
- Knee deformity after injury — The joint looks visibly out of place or at an abnormal angle.
- Inability to bear weight — You cannot take four steps, even with support.
- Severe swelling within hours of injury — Rapid swelling suggests significant internal bleeding or ligament rupture.
- Fever with knee pain — Especially if the knee is hot, red, and swollen. This can signal infection.
- Numbness or coldness below the knee — Indicates potential circulation or nerve compromise.
Schedule a Doctor Visit Soon (Within Days)
- Pain persists beyond 6 weeks despite faithful adherence to the natural protocol.
- Locking or catching sensations — The knee gets “stuck” in position or clicks painfully. Often indicates a meniscus tear or loose body.
- Giving way or instability — The knee buckles unexpectedly during walking or standing. Suggests ligament damage.
- Night pain that wakes you — Pain that interrupts sleep despite rest and positioning.
- Significant swelling that returns repeatedly after activity, even with compression and elevation.
What to expect at the visit: The doctor will examine joint stability, range of motion, and specific tender points. They may order X-rays to check for arthritis or fractures, and MRI if soft tissue damage is suspected. Bring notes on what you’ve tried, what helped, and what didn’t.
Natural methods complement medical treatment. Surgery, injections, or medication don’t replace the habits that prevent recurrence. Many patients find that physical therapy plus the protocol in this guide produces better long-term results than either alone.
Frequently Asked Questions
Can you really fix knee pain without surgery?
Often, yes — but with an important distinction. Manage is almost always possible. Fix depends on the cause. Muscle weakness, mild arthritis, and inflammation respond excellently to natural methods. Structural damage like advanced cartilage loss or torn ligaments may require medical intervention. The key is giving natural methods a structured 8-12 week trial before deciding.
Is walking good for knee pain?
Yes, with caveats. Walking on flat, even surfaces strengthens the quadriceps and improves circulation without high impact. Avoid hills, uneven terrain, and concrete if possible. Start with 10 minutes and increase gradually. If walking causes sharp pain or swelling within 24 hours, reduce duration or switch to cycling or swimming until the joint calms.
Does a knee sleeve help or hurt?
A properly fitted knee sleeve helps — and the mechanism is well-documented. Compression improves circulation, reduces swelling, and provides proprioceptive feedback that helps your brain stabilize the joint. It won’t fix underlying weakness, but it supports recovery and makes daily movement more comfortable. Choose graduated compression in a breathable fabric, and wear during activity rather than 24/7.
What is the fastest way to reduce knee inflammation?
For acute flare-ups: ice + compression + elevation + rest from aggravating activity. Apply ice for 15-20 minutes, 2-3 times daily. Wear a compression sleeve. Elevate above heart level for 20-30 minutes. You’ll typically see visible swelling reduction within 24-48 hours. For chronic inflammation, add turmeric/curcumin supplementation and eliminate processed sugars — both reduce inflammatory cytokines within days to weeks.
Are squats bad for knee pain?
Not inherently — but improper squats are. Deep squats with poor form place enormous stress on the patellar tendon and meniscus. However, partial squats (to 45 degrees), wall sits, and mini squats with perfect form strengthen the quadriceps and actually protect the joint. The key is starting with minimal depth, no added weight, and stopping if you feel sharp pain. Progress depth and repetitions only as strength builds.
How much turmeric should I take for knee pain?
500-1000mg of curcuminoids daily, split into two doses. Curcumin is poorly absorbed on its own — look for formulations with black pepper extract (piperine), which increases absorption by 2000%, or liposomal delivery systems. Take with meals containing fat for best uptake. Expect 4-6 weeks before noticeable improvement in stiffness and pain scores. Quality varies enormously between brands — choose one with third-party testing.
Can stress cause knee pain?
Indirectly, yes. Chronic stress elevates cortisol, your body’s primary stress hormone. Elevated cortisol increases systemic inflammation and can slow tissue repair. Stress also changes movement patterns — tight shoulders, altered gait, muscle guarding — that place abnormal loads on the knee. Managing stress through sleep, meditation, or even brief daily walks isn’t just good for your mind; it’s actively protective for your joints.
Why does my knee hurt more at night?
Three reasons: First, inflammatory fluid accumulates in the joint when you’re still. Second, your cortisol drops at night, reducing natural anti-inflammatory protection. Third, lying flat changes pressure distribution across the cartilage. Try a pillow under or between your knees, do gentle range-of-motion exercises before bed, and ensure your bedroom is cool — warmth increases inflammatory response in already irritated tissues.
Your Path Forward: Start With One Phase
Natural knee pain relief isn’t about finding a miracle cure. It’s about stacking small, evidence-based changes that compound over weeks into meaningful, lasting improvement. The three-phase framework — Foundation, Strengthen, Optimize — gives you that structure.
You don’t need to implement everything tomorrow. You need to start. Here are three actions you can take today:
- Begin the 5-minute morning routine — Do it before you get out of bed tomorrow. Zero equipment, immediate benefit.
- Apply ice and compression after your next flare-up — Follow the RICE protocol properly, not just “rest and hope.”
- Add one anti-inflammatory food this week — The turmeric smoothie takes 3 minutes to make.
The right support gear makes every phase easier. A quality compression sleeve provides proprioceptive feedback during exercises, reduces post-activity swelling, and helps you move with confidence while you build strength. It’s not a crutch — it’s a tool that supports your recovery while your body catches up.
Most people who follow this protocol faithfully notice meaningful improvement within 4 to 6 weeks. Some feel better in days. A few need longer, or need professional help alongside these methods. All of those outcomes are success — because you’re taking control rather than waiting for the pain to decide your limits.
Which phase will you start with? The stairs aren’t going anywhere. But your confidence in climbing them can change starting today.
Disclaimer: This guide supports, not replaces, professional medical advice. If you have red flag symptoms, consult a healthcare provider before beginning any exercise or supplement protocol.