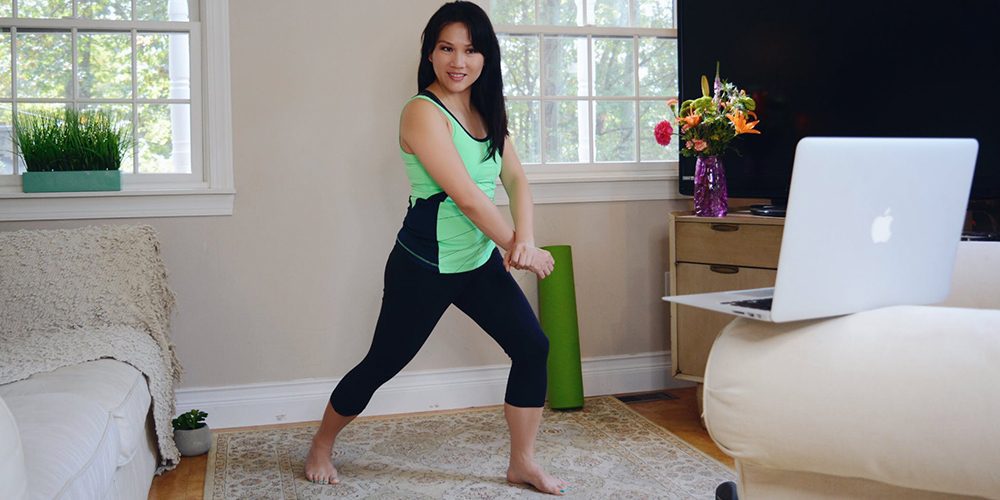

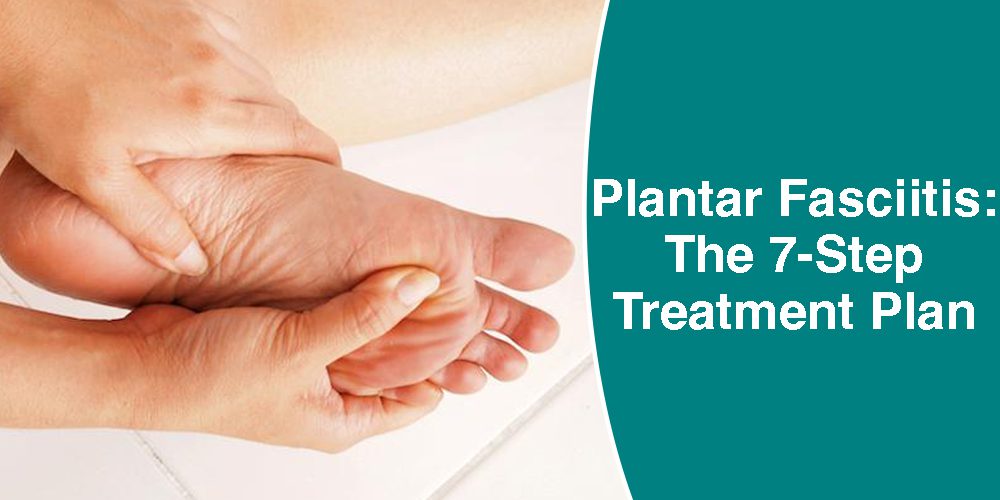
If you are one of the millions of people who suffer from plantar fasciitis, you know how debilitating the condition can be. Not only is it incredibly painful, but it can also make walking and standing extremely difficult. If you are looking for a treatment plan that will help you get your life back, you should consider consulting a physiotherapist, or podiatrist or using an app that creates a treatment plan for you that you can follow.
Or you can create your own treatment plan. All you need is some background knowledge about plantar fasciitis and a proven framework, a template that you can modify to your personal schedule and liking. This article gives you plenty of information about your condition and a framework developed by sports injury physiotherapist Laryke Louw. This framework is the result of dozens of studies and interviews with orthopedics, podiatrists and physiotherapists and has already worked wonders for thousands of people from all around the world.

This article’s purpose is to introduce the 7-step-framework that you can modify for yourself and follow, starting with gentle exercises and advice on load management to allow your pain to calm down and gradually increasing the workout intensity to regain full strength.
Background information about plantar fasciitis
If you want to treat plantar fasciitis on your own, you need some basic information about the condition. Understanding what caused your individual case of plantar fasciitis, how the condition heals, which factors you need to consider and when you should not treat it on your own and instead consult a doctor is essential to plan your recovery and prevent the condition from coming back.
What is the plantar fascia?
The plantar fascia is a relatively inflexible connective tissue that starts at your heels and runs along the bottom of your foot, ending at your toes. The main function of this ligament is to support your arch and act as a shock absorber for the forces your body encounters when you stand, walk or run.
How does plantar fasciitis develop?
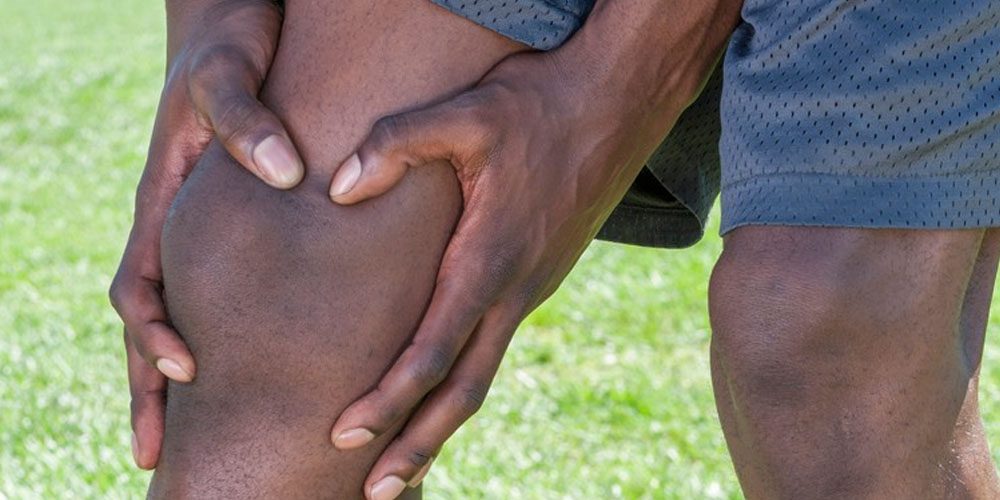
When you overstretch or tear the plantar fascia, it becomes inflamed. This inflammation is called plantar fasciitis and can cause severe heel pain, which is often worse in the morning when you take your first steps out of bed. The pain gradually improves throughout the day as you keep moving but might worsen again after prolonged periods of standing or after intense exercise.
Plantar fasciitis is the most common cause of foot pain for both athletes and non-athletes. It is most common in middle-aged adults, although it can occur at any age. Women are slightly more likely to develop plantar fasciitis than men.
There are many different risk factors that can contribute to developing plantar fasciitis. Some of these include:
– Having a job that involves standing or walking on hard surfaces for long periods of time
– Being overweight
– Having high arches or flat feet
– Wearing shoes that are ill-fitting or do not support your feet properly
– Having tight Achilles tendons or calf muscles
– Suffering from arthritis
What are the symptoms of plantar fasciitis?
The most common symptom of plantar fasciitis is heel pain which is worst in the morning when you take your first steps out of bed. The pain gradually improves throughout the day as you keep moving but might worsen again after prolonged periods of standing or after intense exercise.
Other symptoms can include:
– Pain in the heel and arch that worsens with walking, running or standing for long periods of time
– Pain that is worse at night or after waking up from a nap
– Heel pain that improves with rest
– Swelling or redness in the heel
– Stiffness in the heel
How does plantar fasciitis heal?
Plantar fasciitis is a self-limiting condition, which means it will eventually go away on its own. However, the healing process can take several months and in some cases, the condition might come back.
The good news is that there are many things you can do to speed up the healing process and prevent the condition from coming back. These include:
– Resting: This is one of the most important things you can do to help your plantar fasciitis heal. It is important to avoid activities that aggravate your heel pain, such as running or standing for long periods of time. If you must be on your feet for long periods of time, take breaks often and try to elevate your feet when possible.
– Icing: Icing can help reduce inflammation and pain. Try to ice your heel for 20 minutes at a time, several times a day.
– Stretching: Stretching the muscles and tendons around your foot can help ease pain and speed up healing. A physical therapist or certified athletic trainer can show you how to properly stretch for plantar fasciitis.
– Supportive shoes: Wearing shoes that support your feet can help reduce stress on the plantar fascia and prevent the condition from coming back. Look for shoes with good arch support and a cushioned sole.
– Orthotics: Custom orthotics or over-the-counter shoe inserts can help provide additional support for your feet.
– Night splints: Wearing a night splint can keep your foot in a stretching position while you sleep, which can help reduce morning heel pain.
– Compression: Wearing compression socks, compression sleeves or wraps can help reduce swelling. The improved blood circulation can also speed up healing.
– Weight loss: If you are overweight, losing even a few pounds can help reduce stress on your feet and ease plantar fasciitis pain.

You see, there are several things that you can do on your own to ease the pain and help plantar fasciitis from healing by itself. But there are instances and individual cases that call for professional help.
When to see a doctor
In most cases, plantar fasciitis will improve with self-care measures. However, there are some instances where you might need to see a doctor. These include:
– Severe heel pain that is not improving with home treatment
– Heel pain along with numbness or tingling in your foot
– You have heel pain that is preventing you from participating in your normal activities
– Diabetes or another medical condition that puts you at risk for foot problems
– Your heel pain has lasted more than a few months
If you do need to see a doctor, they will likely start by asking about your symptoms and medical history. They might also order imaging tests, such as an X-ray or MRI, to rule out other conditions.
Once they have diagnosed plantar fasciitis, they will likely recommend a combination of self-care measures and medical treatments. These can include:
– Physical therapy: A physical therapist can teach you exercises and stretches to help reduce pain and improve flexibility. They might also use modalities, such as ultrasound or electrical stimulation, to help reduce pain.
– Orthotics: Custom orthotics or shoe inserts can help provide support for your feet.
– Steroid injections: Injections of corticosteroids can help reduce inflammation. However, they are not recommended for long-term use.
– Surgery: In rare cases, surgery might be necessary to release the plantar fascia or remove a heel spur.
If you are dealing with plantar fasciitis, don’t despair. There are many things you can do to ease the pain and help the condition heal. But if home treatment doesn’t seem to be working, don’t hesitate to see a doctor. They can provide you with the care you need to get back on your feet.
Healing times and prevention
Recovery times for plantar fasciitis vary from person to person. For most people, the condition will improve within a few months with self-care measures and conservative treatments. Depending on the severity of your symtpoms, you may need treatment from 12 weeks up to 18 months to regain full strength.
To prevent plantar fasciitis from coming back or getting worse, it is important to:
– Wear shoes that support your feet
– Stretch your calf muscles and plantar fascia daily
– Avoid high-impact activities, such as running and jumping if they cause pain
– Lose weight if you are overweight or obese
– Maintain a healthy weight
– Avoid walking barefoot on hard surfaces
The 7-Step-Framework-Treatment-Plan for Plantar Fasciitis
Our proven framework that you can use as a template to create or modify your own treatment plan consists of 7 individual steps. Please make sure to just take one step at a time. Don’t rush it and work your way down slowly to increase your recovery chances.
Step 1: Let’s get it started
The main goal during this phase is to allow your plantar fascia to relax as you increase strength in low-load postures.
Morning and evening stretches
Getting up in the morning and after a long day on your feet to do gentle stretches and massage can help you feel less pain. You can use the following exercises and massage techniques:
Bottle or Ball Rolls: 1. Place a frozen water bottle on the ground and stand beside it. If you have trouble keeping your balance, practice this exercise beside a table, chair or wall.
2. Put one foot on the bottle and slowly roll the frozen water bottle back and forth under your foot for 1-3 minutes. 3. Slowly increase the pressure by shifting more of your body weight on the treated foot.
The frozen water bottle is perfect because it ices the plantar fascia while gently massaging it. If you can’t use a frozen water bottle for whatever reason, you can replace it with a tennis or golf ball to get similar massage effects.
Thumb Pushes and Thumb Pulls: 1. Sit down on a bed or chair and cross on leg over the other. 2. Place your thumbs on the bottom of your foot and push down with moderate pressure. 3. Push or pull along the length of your sole, from your heel to your toes and back. Then put your thumbs back in the middle and pull one thumb to the left while pulling the other to the right. 4. Repeat this sequence 10 times on each foot.
Calf Raises: 1. Using a chair, countertop or wall for support, stand with the balls of both feet planted firmly on the ground and your heels hanging off the edge of a step. 2. Keeping your knees straight, raise your heels until you are standing on your tiptoes, then lower them back down below the level of the step. 3. Repeat this 15-20 times for one set, and perform 2-3 sets total.
Calf Kneading: 1. Start by sitting on a bed or chair with your feet flat on the ground. 2. Using both hands, reach down and grab hold of your calf muscle, and knead it with your thumbs in a circular motion. 3. Work your way up and down the muscle, from your ankle to your knee. 4. Repeat this sequence 10 times on each leg.
Hand and Thumb Massage: Use your thumb or a tennis ball to massage your plantar fascia. You can also use a foam roller. Start at the base of your toes and work your way up to your heel. Do this for 1-2 minutes.
Heel raises: Stand with both feet flat on the ground and slowly raise up onto your toes. Hold this position for 2-3 seconds before lowering back down. Repeat this 10-15 times.
Toe stretches: Sit with your legs crossed and reach down to grab hold of your big toe. Gently pull it back towards your body until you feel a stretch in the arch of your foot. Hold this position for 30 seconds before releasing. Repeat 2-3 times per foot.
Foot and ankle strength and control
This stage combines activities that strengthen the muscles around the ankle and foot, reducing strain on the plantar fascia. These are low-intensity workouts done in postures that don’t put any stress on the plantar fascia.
The following exercises are recommended:
Toe curls /pick-ups: 1. Start by sitting in a chair with your feet flat on the floor and a small towel placed under your foot. 2. Use your toes to grab hold of the towel and lift it up off the ground, then let it back down. 3. Repeat this 10-15 times for one set, and perform 2-3 sets total.
Heel raises: Stand with both feet flat on the ground and slowly raise up onto your toes. Hold this position for 2-3 seconds before lowering back down. Repeat this 10-15 times.
Negative Calf raises: Using a chair, countertop or wall for support, stand with the balls of both feet planted firmly on the ground and your heels hanging off the edge of a step. Keeping your knees straight, raise your heels until you are standing on your tiptoes, then lower them back down below the level of the step. Repeat this 15-20 times for one set, and perform 2-3 sets total.
Ankle circles: 1. Start by sitting in a chair with both feet flat on the ground. 2. Raise one foot off the ground and make small circles with your ankle. 3. Reverse the direction of the circles and continue for 30 seconds to 1 minute. 4. Repeat this exercise 2-3 times per foot.
Ankle pumps: 1. Start by sitting in a chair with both feet flat on the ground. 2. Raise your heels off the ground and then your toes, so that you are standing on your tiptoes. 3. Lower your heels back down below your toes and then your toes back down to the ground. 4. Repeat this 10-15 times for one set, and perform 2-3 sets total.
Heel walk: 1. Start by standing with both feet flat on the ground. 2. Raise up onto your toes and begin walking forward, leading with your heels. 3. Walk for 20-30 seconds before returning to a normal walking pattern. 4. Repeat this 5 times.
Toe walk: 1. Start by standing with both feet flat on the ground. 2. Raise up onto your toes and begin walking forward, leading with your toes. 3. Walk for 20-30 seconds before returning to a normal walking pattern. 4. Repeat this 5 times.
Towel Tug: 1. Start by sitting in a chair with both feet flat on the ground and a small towel placed under your foot. 2. Grab the ends of the towel with your hands and pull it towards you, until you feel a stretch in your ankles and calf muscle. 3. Hold this position for 30 seconds before releasing. 4. Repeat 2-3 times per foot.
Leg and core strength
When you run or walk, your core and lower leg muscles must absorb a lot of force. If they are lacking, the plantar fascia may be overloaded. This stage begins you off with core and lower-leg exercises in postures that keep the strain off your plantar fascia, as it does with foot and ankle activities.

The best exercises for this stage are:
Planks: 1. Start by lying on your stomach with your elbows and forearms planted firmly on the ground, shoulder-width apart. 2. Raise yourself up so that you are resting on your toes and forearms. 3. Hold this position for 20-30 seconds before lowering back down. 4. Repeat 3-5 times.
Side Planks: 1. Start by lying on your side with one elbow and forearm planted firmly on the ground, shoulder-width apart. 2. Raise yourself up so that you are resting on your forearm and the side of your foot. 3. Hold this position for 20-30 seconds before lowering back down and repeating on the other side. 4. Repeat 3-5 times per side
Bridge: 1. Start by lying on your back with your knees bent and feet flat on the ground, shoulder-width apart. 2. Raise your hips up off the ground until your thighs and torso are in line with each other. 3. Hold this position for 2-3 seconds before lowering back down and repeating. 4. Repeat 10-15 times
Clamshells: 1. Start by lying on your side with both legs bent at a 90 degree angle, ankles stacked on top of each other. 2. Using your core muscles to stabilize your spine, raise your upper leg up towards the ceiling, keeping your feet touching throughout the movement. 3. Hold this position for 2-3 seconds before lowering back down and repeating. 4. Repeat 10-15 times per side.
Superman: 1. Start by lying face down on the ground with your arms extended out in front of you and your legs extended straight back behind you. 2. Simultaneously raise your arms, legs, and chest off the ground and hold for 2-3 seconds. 3. Lower back down and repeat. 4. Repeat 10-15 times.
Side Leg Lift: 1. Start by lying on your side with both legs straight. 2. Slowly lift your upper leg up towards the ceiling, keeping your hips and lower back pressed firmly into the ground. 3. Hold this position for 2-3 seconds before lowering back down and repeating. 4. Repeat 10-15 times per side.
Free Squats: 1. Start by standing with your feet shoulder-width apart and your arms extended out in front of you. 2. Slowly lower yourself down into a squatting position, keeping your knees behind your toes and your chest up. 3. Hold this position for 2-3 seconds before returning to the starting position and repeating. 4. Repeat 10-15 times.
Flexibility workouts
It’s critical to maintain adequate flexibility in all of the muscles that make up your posterior chain (those that run down the back of your body and connect to your plantar fascia) and engage with it. For this reason, this stage includes glute, hamstring, and calf stretches.
Necessary exercises and stretches include:
Hip flexor stretch: 1. Start by kneeling on one knee with your other foot planted firmly on the ground in front of you. 2. Keeping your back straight, lean forward until you feel a stretch in the front of your hip. 3. Hold this position for 30 seconds before repeating on the other side. 4. Repeat 2-3 times per side.
Hamstring stretch: 1. Start by lying on your back with one leg extended straight out in front of you and the other bent at the knee with the foot planted firmly on the ground. 2. Using a towel or strap, loop it around the raised leg’s foot and hold onto both ends with your hands. 3. Gently pull on the towel/strap while keeping your leg as straight as possible until you feel a stretch in the back of your leg. 4. Hold this position for 30 seconds before repeating on the other side. 5. Repeat 2-3 times per side.
Calf stretch: 1. Start by standing with one foot behind you and the other planted firmly in front of you, shoulder-width apart. 2. Keeping your back straight and your heel pressed firmly into the ground, lean forward until you feel a stretch in your calf muscle. 3. Hold this position for 30 seconds before repeating on the other side. 4. Repeat 2-3 times per side.
Glutes stretches: 1. Start by lying on your back with both legs bent at the knee and your feet flat on the ground. 2. Place one hand on your thigh and slowly raise your leg up towards the ceiling, keeping your back pressed firmly into the ground. 3. Hold this position for 30 seconds before lowering back down and repeating on the other side. 4. Repeat 2-3 times per side.
Tips to optimize recovery
If you’re practicing these exercises and stretches it is necessary to not stress it too much. This can actually delay your healing process. Here are some tips to optimize your recovery:
1. Make sure to warm up before any activity, especially if you’ll be stretching. A short walk or light jog is a great way to do this.
2. Don’t push yourself too hard. If an exercise is causing you pain, stop and rest.
3. Listen to your body. If you’re feeling fatigued, take a break and come back later.
4. Stay hydrated by drinking plenty of water throughout the day.
5. Eat healthy foods that will help reduce inflammation, such as omega-3 fatty acids found in fish, nuts, and seeds.
6. Get enough sleep. Recovery happens when you’re resting, so make sure to get at least 7-8 hours per night.
7. Practice stress-reducing methods such as yoga or meditation.
8. Use ice to reduce inflammation and pain. Apply for 20 minutes at a time, multiple times per day.
9. Avoid activities that put strain on your feet, such as running or standing for long periods of time. If you must do these activities, be sure to take frequent breaks and wear supportive shoes.
Activities to avoid
- Reduce your standing and walking to minimize any increase in discomfort during or after.
- Avoid running, jumping, and hopping activities.
When to progress
You can progress to the next stage when:
- You can complete the foot strength workouts with ease,
- and you pass the heel raise test:
The heel raise test: 1. Start by standing on both feet. 2. Slowly raise up on your toes, then back down again. 3. Repeat this 10 times. If you can do this without pain, you can move on to the next stage.
If you are still experiencing pain after completing all the exercises and stretches in this stage, consult your doctor or physiotherapist before progressing to the next stage.
Step 2: Building A Base
During this phase, the treatment plan will aid you in preparing your plantar fascia, foot, and leg muscles for heavy strength training. The exercises will now include weight-bearing postures that work the plantar fascia effectively.

Recommended exercises for this step:
Calf stretch off-step: 1. Start by standing on a step with the ball of your foot hanging off the edge. 2. Keeping your heel pressed firmly into the step, lower your calf muscles down until you feel a stretch in your Achilles tendon. 3. Hold this position for 30 seconds before raising back up and repeating on the other side. 4. Repeat 2-3 times per side.
Wall stretch with knees bent: 1. Start by standing with your back against a wall and your feet about shoulder-width apart. 2. Bend your knees and lower your hips until your thighs are parallel to the ground. 3. keeping your heels pressed firmly into the ground, lean forward until you feel a stretch in your calf muscles. 4. Hold this position for 30 seconds before straightening back up and repeating on the other side. 5. Repeat 2-3 times per side.
Quadruped Rock Back – Big Toe Extension: 1. Start on your hands and knees with your wrists directly beneath your shoulders and your knees directly beneath your hips. 2. Keeping your back flat, try to press your toes into the ground while lifting up your heels (like when doing pushups). 3. You should feel a stretch in your Achilles tendon and the bottom of your foot. 4. Hold this position for 30 seconds before releasing and repeating on the other side. 5. Repeat 2-3 times per side.
Big Toe Raises: 1. Start by sitting in a chair with your feet flat on the ground. 2. Place a small weight (dumbbell, can, etc.) beneath your big toe joint and press down into it while also trying to lift your toe up toward the ceiling. 3. You should feel a stretch in the bottom of your foot and along your Achilles tendon. 4. Hold this position for 30 seconds before releasing and repeating on the other side. 5. Repeat 2-3 times per side.
Single Leg Squats: 1. Start by standing on one leg with your knee slightly bent. 2. Keeping your back straight and your core engaged, slowly lower yourself down into a squatting position. 3. Go as low as you can while still keeping good form (knee over ankle, etc.) 4. Hold this position for 30 seconds before returning to the starting position. 5. Repeat 2-3 times per side.
Clams: 1. Start by lying on your side with your hips and knees bent to 90 degrees. 2. Keeping your feet together, raise your top knee as high as you can while keeping your heels touching. 3. Hold this position for 30 seconds before lowering back down and repeating on the other side. 4. Repeat 2-3 times per side.
Toe Yoga: 1. Start by sitting in a chair with your feet flat on the ground. 2. Now try to ONLY lift your big toe off the ground while keeping the rest of your toes down. 3. Hold this position for 5 seconds before returning to the starting position. 4. Now lift your other toes (not the big toe) off the ground, one at a time. 5. Hold each position for 5 seconds before returning to the starting position and repeating with the other toes. 6. Repeat 2-3 times per side.
Activities to avoid
It would be ideal if you avoided all jumping and running activities. Furthermore, keep your walks to a minimum so that they don’t exacerbate your discomfort.
When to progress
You can move on to step 3:
- When it’s possible for you to go short distances,,
- and complete the assigned strength training routines without increasing discomfort.
Step 3: Building Load Capacity
When you’re standing, walking, jogging, or jumping, the plantar fascia must take a lot of strain. When you run, for example, your foot and leg can produce up to 6 times your bodyweight in force.
It’s also critical to include significant strength training into your recovery program if you want your plantar fascia to withstand these kinds of strains. The treatment plan includes this process by gradually increasing the weight and intensity of your workouts while monitoring your progress.
Exercises in step 3 are:
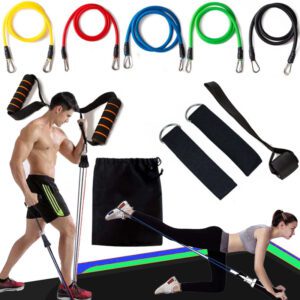
Inversion with Resistance Bands: 1. Anchor a resistance band around a sturdy post and loop the other end around your foot (just above the ankle). 2. Step away from the anchor point to create tension on the band. 3. Keeping your leg straight, slowly lift your foot upward (inverting your ankle) until you feel a stretch in your calf muscle. 4. Hold this position for 30 seconds before returning to the starting position. 5. Repeat 2-3 times per side.
Dorsi-Flexion with Resistance Bands: 1. Anchor a resistance band around a sturdy post and loop the other end around your foot (just above the ankle). 2. Step away from the anchor point to create tension on the band. 3. Keeping your leg straight, slowly lift your foot upward (dorsiflexing your ankle) until you feel a stretch in the front of your lower leg. 4. Hold this position for 30 seconds before returning to the starting position. 5. Repeat 2-3 times per side.
Full Squats with Weight: 1. Start by standing with your feet shoulder-width apart and a weight in each hand (dumbbells, barbell, kettlebells, etc.). 2. Keeping your back straight and your core engaged, slowly lower yourself down into a squatting position. 3. Go as low as you can while still keeping good form (knee over ankle, etc.). 4. Hold this position for 30 seconds before returning to the starting position and repeating. 5. Repeat 2-3 times.
Lunges with Weight: 1. Start by standing with your feet shoulder-width apart and a weight in each hand (dumbbells, barbell, kettlebells, etc.). 2. Step forward with one leg, lowering your body down until both knees are bent at 90 degrees. 3. Make sure your front knee is not extended past your toes and that your back knee does not touch the ground. 4. Hold this position for 5 seconds before returning to the starting position and repeating with the other leg. 5. Repeat 2-3 times per side.
Calf Raises with Weight: 1. Start by standing with your feet shoulder-width apart and a weight in each hand (dumbbells, barbell, kettlebells, etc.). 2. Keeping your core engaged and your legs straight, raise up onto your toes. 3. Hold this position for 5 seconds before lowering back down and repeating. 4. Repeat 2-3 times.
Split Squats: 1. Start by standing with your feet shoulder-width apart. 2. Place your hind leg on a step, stool or sofa. 3. Keeping your back straight, lower yourself down until both knees are bent at 90 degrees. 4. Make sure your front knee is not extended past your toes and that your back knee does not touch the floor. 5. Hold this position for 30 seconds before returning to the starting position and repeating with the other leg. 6. Repeat 2-3 times per side.
Single-Leg Romanian Deadlifts: 1. Start by holding a weight in your left hand and standing on your right leg. 2. Keeping your core engaged, hinge at the waist and slowly lower the weight down towards the floor. 3. When you feel a stretch in your hamstring, raise back up to the starting position. 4. Repeat 2-3 times before switching sides and repeating.
Glute Bridges: 1. Start by lying flat on your back with feet flat on the ground and shoulder-width apart, legs bent to 90 degrees. 2. Place your hands flat on the ground beside you for stability. 3. Drive your heels into the ground, and lift your torso and upper legs into the air, extending your hips until your thighs and torso are in line with each other- a straight diagonal line from shoulders to knees. 4. Squeeze your glutes at the top of the bridge. 5. Hold for 2 seconds before slowly lowering back down to the starting position. 6. Repeat 2-3 times.
Side-Lying Leg Raise: 1. Start by lying on your side with your bottom leg straight and the top leg bent at the knee so that your foot is in front of your glute. 2. Keeping your core engaged, raise your top leg up into the air as high as you can without arching your back. 3. Hold for 5 seconds before lowering back down and repeating. 4. Repeat 2-3 times before switching sides and repeating.
Plank: 1. Start by lying on your stomach with your elbows bent and tucked underneath you, hands shoulder-width apart. 2. Push off the ground, raising yourself up onto your toes and elbows so that your body forms a straight line from head to heels. 3. Tuck your chin to ensure a neutral spine position. 4. Hold for 30 seconds before lowering back down to the starting position. 5. Repeat 2-3 times.
Activities to avoid
It is still necessary to avoid all running and jumping activities.
When to progress
Continue to step 4 if:
- You can go for a stroll at a leisurely pace for 30 minutes,
- can complete the heel raise exercises with a weight that is 10% of your body weight
- and do your exercises without increasing your pain.
Step 4: The Plyometric Hop Program
In step 4, the framework will assist you in preparing your plantar fascia for the powerful forces it will encounter while running. This is achieved through a plyometric (hop) program that is progressive. You’ll also continue to focus on the overall leg and calf muscles.
Plyometric exercises build up energy in your muscles and then release this energy. That way, your muscles are shorting and lengthening gradually which leads to better and softer training results.
Exercises for the plyometric hop program:
Jump Rope: 1. Start by standing with feet shoulder-width apart and the rope behind you. 2. Swing the rope over your head and jump when it reaches your feet. 3. Land lightly on the balls of both feet and immediately jump again. 4. Continue for 30 seconds before resting for 30 seconds and repeating 2 more times.
Squat Jumps: 1. Start standing with feet shoulder-width apart and arms at your sides. 2. Lower your body into a squat position, bringing your thighs parallel to the ground. 3. Quickly jump up into the air, using your arms for extra momentum. 4. Land softly on the balls of both feet and immediately sink back down into a squat position. 5. Repeat for 30 seconds before resting for 30 seconds and repeating 2 more times.
Box Jumps: 1. Start standing in front of a sturdy box or bench with feet shoulder-width apart and arms at your sides. 2. Lower your body into a squat position, bringing your thighs parallel to the ground. 3. Quickly jump up onto the box, using your arms for extra momentum. 4. Step back down to the ground and immediately sink back down into a squat position. 5. Repeat for 30 seconds before resting for 30 seconds and repeating 2 more times.
Lateral Hopping Drills: 1. Start by standing on your left leg with your right knee bent and your arms at your sides. 2. Hop to the right, landing on your right foot and bringing your left knee up in front of you. 3. Immediately hop back to the left, bringing your right knee up in front of you. 4. Repeat for 30 seconds before resting for 30 seconds and repeating 2 more times. 5. Switch legs and repeat on the other side.
Progressions:
1. When you can complete 3 sets of each exercise without pain,
2. You can increase the time to 45-60 seconds per set,
3. You can increase the number of sets to 4-5.
Exercise safety tips
Beginners should start on a soft, flat surface, such as a grass playing field or a cushioned mat or floor. To gradually develop the skill and endurance required for more aggressive jumping drills, start with several weeks of progressive training. If you are inexperienced with plyometric training, it is also suggested that you work with a coach or trainer.
Activities to avoid
Avoid running activities.
When to progress
You can progress to step 5 when:
- 30 minutes of brisk walking is a good thing to do,
- you can do the Heel Raise exercise with a weight that is 20% of your body weight
- and have completed the full hopping procedure without discomfort and pain.
Step 5: Walking & Running
You’ve completed all of the essential preparations and are ready to start a running program again. The safest approach to gradually returning to running is with an alternating-short-running-and-walking routine. Warm-up and cool-down activities are included in the plantar fasciitis treatment plan, which leads you through this process step by step.
Warm-Up
A good warmup is required for every safe exercise, but that doesn’t mean you have to stand still and stretch out each of your muscles! Your warmup should be designed to gradually raise your heart rate, improve the range of motions in your important joints, increase capillary activation, and enhance tendon and ligament elasticity.
A standard running warm-up should include activities to “wake up” your hip flexors and legs, such as lunges, squats, and leg swings. When you have plantar fasciitis, though, you must pay close attention to your ankles, calves, and plantar fascia ligament in your warm-up. Recommended warm-up exercises are:
- Calf raises
- Pointing and flexing toes
- Ankle circles
Warm-up stretches are crucial. But don’t limit yourself to stretching your legs and feet before a run. To help strengthen your muscles, increase flexibility, and alleviate any pain caused by plantar fasciitis, take some time to stretch your calves, thighs, and feet. If you need some good exercises, scroll up a but and you’ll find plenty of great stretches for your feet, ankles, calves and legs.
Start with walking
When recovering from plantar fasciitis it is highly recommended to take it slow when returning to running. Start by walking for 5-10 minutes to increase blood flow to the affected area and reduce stiffness. You should feel a gentle stretch in your Achilles tendon, calves, and plantar fascia with each step. If you experience any pain while walking, stop immediately and go back to the exercises of steps 1-5.
Once you’ve completed your warm-up, it’s time to start running. Start with a slow jog for 1-2 minutes, then walk for 2 minutes to catch your breath. Repeat this cycle 5-10 times, gradually increasing your running speed each time. Remember to focus on proper form: keep your head up, shoulders back, and land on your forefoot.
If you experience any pain while running, stop immediately and go back to the exercises of steps 1-5.
Cool-down & Stretch
After your run, it’s important to cool down gradually to avoid feeling dizzy or lightheaded. Walk for 5 minutes at a slower pace than you used during your warm-up.
Once you’ve cooled down, it’s time to stretch. Stretching after exercise will help reduce DOMS (delayed onset muscle soreness), improve flexibility and range of motion, and prevent injury. Be sure to stretch all of the muscles used during your run, including your calves, hamstrings, quads, hip flexors, and plantar fascia. Hold each stretch for 20-30 seconds.
Maintaining strength
Because the primary emphasis of your strength exercises will shift to maintaining what you’ve accomplished, their frequency will drop as your running volume rises. This change is essential for avoiding overload of your plantar fascia, especially if you continue to do high volumes of strength training while also increasing your running amounts.
Activities to avoid
High-intensity workouts such as tempo runs, intervals, and hill sessions should not be done yet.
When to progress
When you can jog 20 minutes at a leisurely speed without aggravating your symptoms, move on to step 6.
Step 6: Full Endurance Runs or Light Sports Training
The emphasis is now on recuperating your previous running endurance in your plantar fascia and leg muscles. However, don’t go overboard with your running quantities and frequencies too fast. The adaptation of your plantar fascia and the growth of its strength will take time.
The strength exercises in this step will help you maintain the strength you’ve acquired throughout the previous phases.
In this step, gradually increase the distance and frequency of your runs while maintaining the same easy pace. The goal is to eventually be able to run the weekly volume you had before plantar fasciitis put you on the sideline. Make sure to warm up and cool down with each run, and to stretch afterward.
Though it feels as if you are returning to your pre-plantar fasciitis form, you should still not forget about your daily routine. The stretching, foam rolling, and strengthening exercises should still be done every day to help prevent a relapse.
If you’re not a runner but a football or basketball player, for example, you can do light training sessions consisting of dribbling and shooting drills by now. This treatment plan focuses on runners mostly, but when you have reached step 6, you can start with any sports that you want to get back to.
Activities to avoid
Avoid intense running, such as tempo runs, sprints, or hill workouts. High-intensity training generates far greater forces than easy jogging sessions, and your plantar fascia won’t be sturdy enough to handle them yet.
When to progress
When you’re able to run your usual weekly running volume at your regular easy jogging speed pain-free, you can advance to the last step.
Step 7: Running Intensity and Speed & Full Sports Training
It’s now or never to get started training at a quicker and more intensive pace. It’s common to start with just once a week and ease into it – don’t go all out from the outset.
Again, if you’re not a runner but rather play football or basketball, soccer, tennis, golf or hockey, you can now start doing drills that are more game-like. You should still be careful and listen to your body. Any sign of discomfort or pain in your plantar fascia should be taken seriously and you should reduce the intensity or duration of your training.
When adding speed workouts, start with short intervals of no more than 400m. Do a few repeats at this pace, then jog slowly for 200m to recover. Gradually increase the number of repeats as well as the distance of each interval. Do these workouts once a week to start, then increase the frequency as you get used to the faster pace.
The focus of your strength training should now be on explosiveness – exercises such as box jumps, power cleans, and sprints up hills will help you generate more force. These types of workouts are essential for runners because they help you run faster and with better form.
Activities to avoid
Avoid running on hard surfaces like concrete for too long. Try to mix it up by running on different surfaces to avoid overloading your plantar fascia.
If you want to protect yourself against re-injury, you should continue doing your weekly strength training regimen to aid your running activities. The framework of this treatment plan and your experience of incorporating it into your life will help you stay pain-free. Hopefully forever.
Conclusion
If you’re one of the many people who suffer from plantar fasciitis, don’t despair – there is hope. This seven-step treatment plan will help you gradually get back to your old self without aggravating your injury. Remember to be patient and take things slow; rushing through the steps could undo all of your hard work. When in doubt, always consult with a medical professional.
Do you have any experience with plantar fasciitis? What treatment worked best for you? Let us know in the comments below.